01Prepare the surface
Brush off as much dirt, dust and grit as you can from your intended surface, as these can limit the bonding ability of the Adjustable Screws.
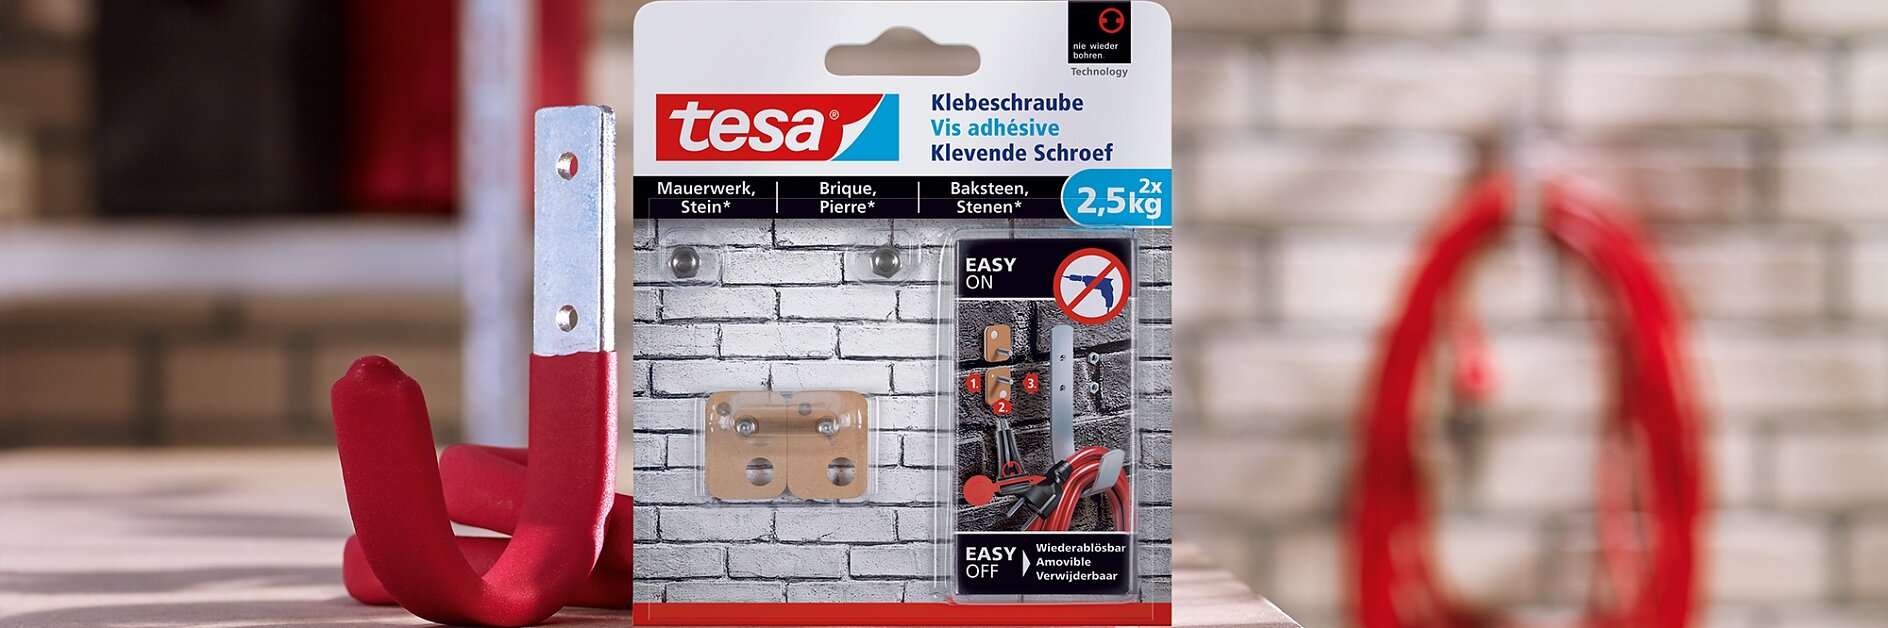
The smart, subtle way to mount slim objects on rough and solid surfaces.
Click through the tabs above this step-by-step video to see how quick and easy it is to get your projects – and your possessions – off the ground.
No drills, no drill bits, no rawl plugs. No fuss and no noise or mess, either. These Adhesive Screws are perfect to mount on rough surfaces, inside or out. And the best bit is there’s no damage to surfaces.

Brush off as much dirt, dust and grit as you can from your intended surface, as these can limit the bonding ability of the Adjustable Screws.

Peel off the foil from the base of the each screw to expose the adhesive surfaces. Stick the screws where you want to mount them (find the smoothest, most even spot you can) and then gently press down so that they stay in place.
Pierce the nozzle of the tube with the tool provided then slip the tool over the other end of the tube.

Insert the nozzle into the larger hole on each screw and inject the formula until it starts to emerge from the smaller hole. There’s no need to press down on the screws - just leave them for 12 hours or overnight to let the nie wieder bohren. Technology do its thing; the moisture in the air reacts with the formula and gives it its sticking power.

Remove the nuts from the bolts, mount the cable hook and replace the nuts. You’re not limited to mounting hooks, though – you can hang pretty much anything – like signs, bird boxes or lightweight flowerpots. Each screw will support 2.5kg, so just use two of them for objects up to 5kg.

Removing an Adhesive Screw is seriously easy. We developed nie wieder bohren. Technology to be strong when you need it to be and not when you don’t. Just take an adjustable wrench or a pair of pliers, get a firm grip on the screw and then slowly but firmly twist the screw away from the surface.