01What We Need:
We need pressed leaves, wooden veneer (get some oak veneer for this lantern), straight glass lanterns, scissors, pencil, ruler, tesapack® Extra Strong, tesa® 64621 Double Sided Tape, and tesa® PERMANENT spray glue.
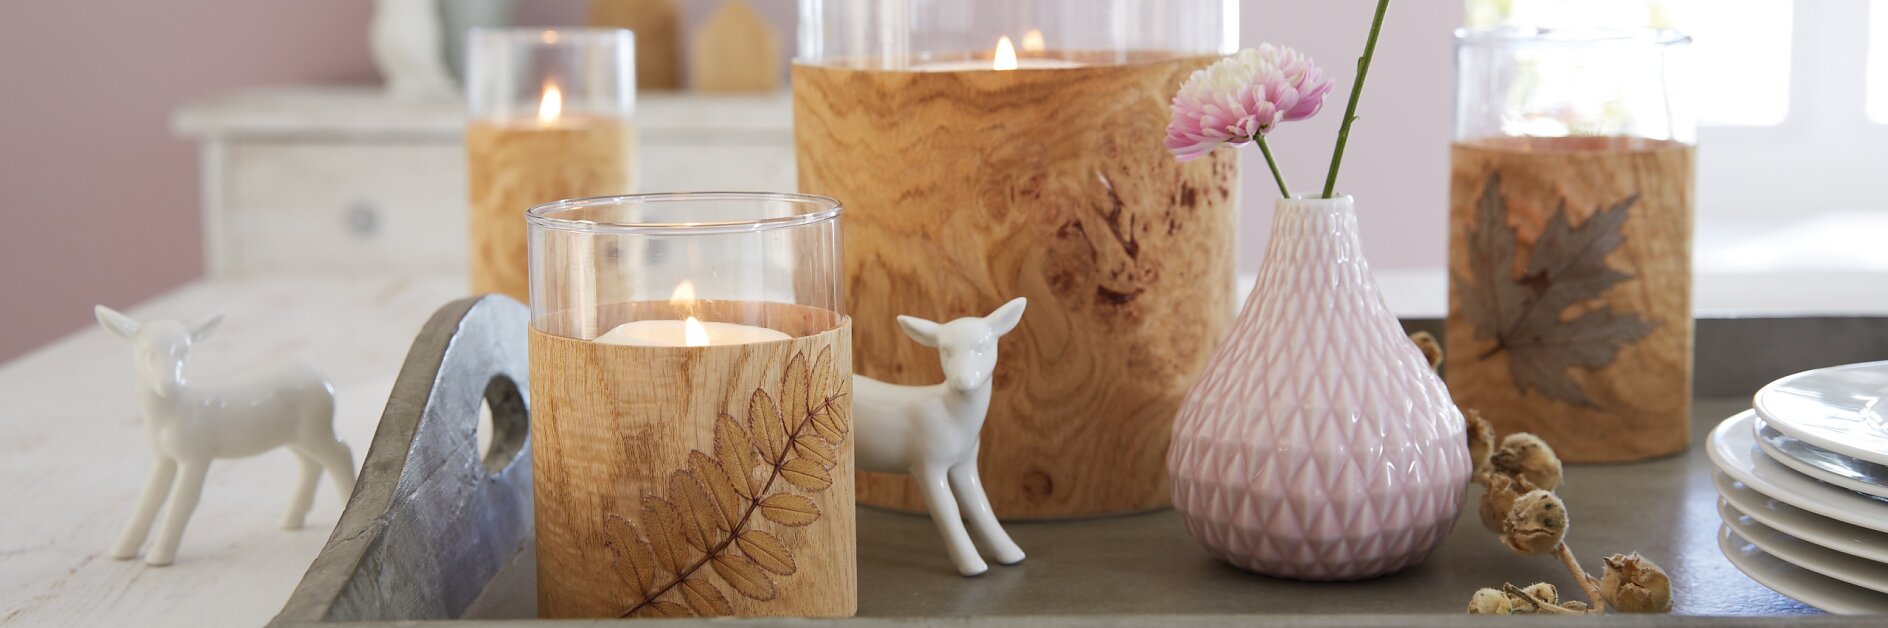
Hard to believe! Veneer and pressed leaves turn plain glass lanterns into beautifully unique ones.
We need pressed leaves, wooden veneer (get some oak veneer for this lantern), straight glass lanterns, scissors, pencil, ruler, tesapack® Extra Strong, tesa® 64621 Double Sided Tape, and tesa® PERMANENT spray glue.
To ensure the veneer cannot not break so easily, completely cover the back with tesapack® Extra Strong so that it slightly overlaps at the edges.
Note down the measurements of the lantern on the front of the veneer: desired height x circumference + 1.5 cm.
Cut out the shape from the veneer.
Spray a leaf with tesa® PERMANENT spray glue.
Attach the leaf to the veneer where you want it.
Cut a 1.5 cm strip of tesa® 64621 Double Sided Tape, which is the same height as the veneer, then stick it to one side and remove the protective foil.
Carefully wrap the veneer around the lantern and stick the edges together.
Enjoy your self-made lantern with a creative fall motive!

