tesa trendpapier 5 / Idee 2: Hakenleiste / Aufmacher quer

Decorative bathroom hook rack: To each his own

Cleaning up made easy: Now Sophie and Lucas always know just where to put their toothbrushes and razors. Their cosmetics hang in colourful bags under their rack, an original creation by the brand "do-it-yourself".

Difficulty Level Leisurely inspiration
Duration 20

We need:

paper to catch paint cutting surface cutter self-adhesive decorative film templates plywood: 13 x 110 x 0.6 mm white acrylic paint brush small plastic cosmetic bags tesafilm® tesa Powerstrips® waterproof strips (Large) 2 tesa Powerstrips® waterproof toothbrush holder Zoom metal 2 tesa Powerstrips® waterproof hooks Zoom metal tesa Powerstrips® waterproof razor holder Zoom metal

How we do it:

DIY Bathroom Hook Rack / Step 1: Overview
01

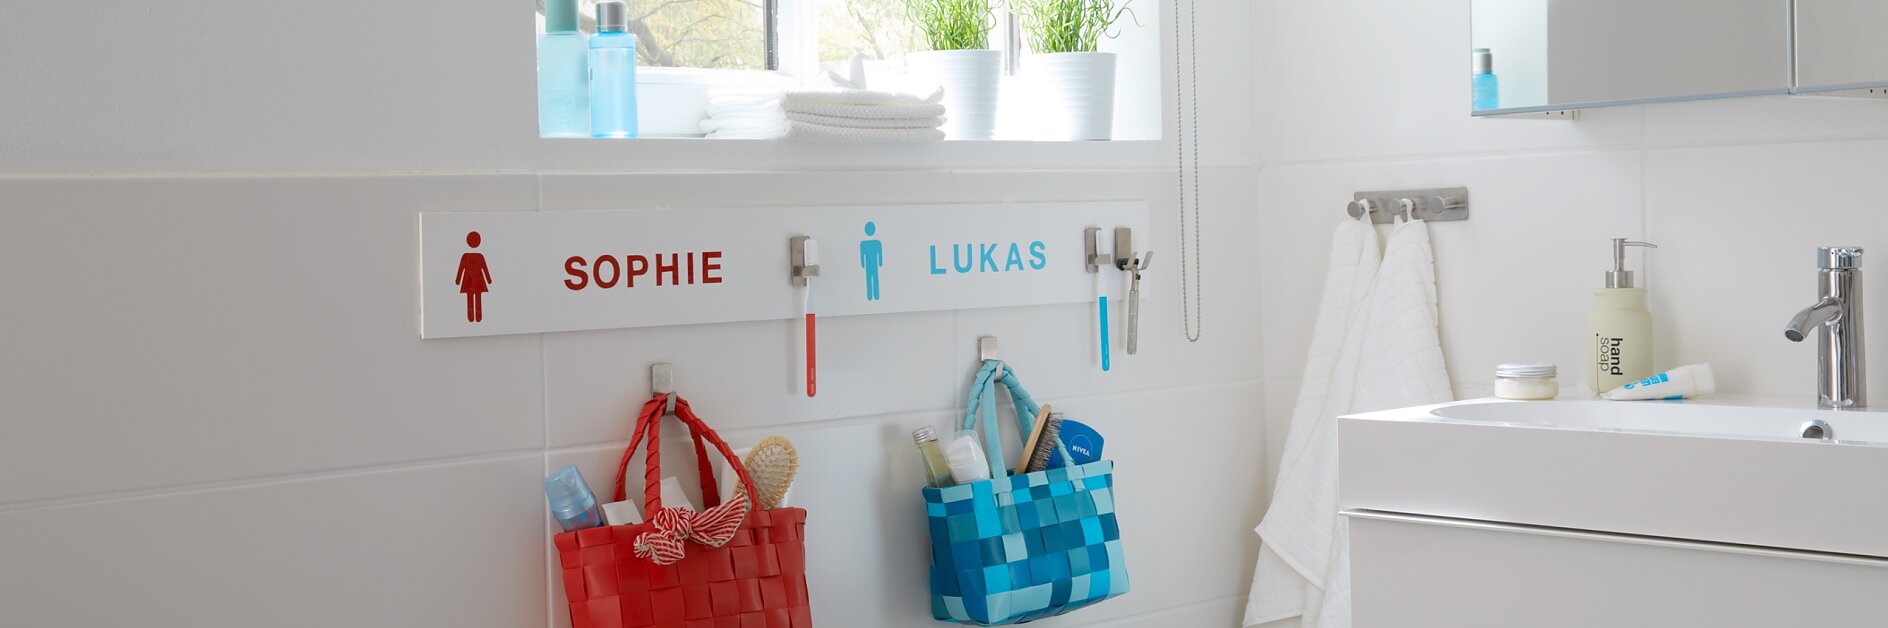
What we'll need: paper to catch paint, cutting surface, cutter, self-adhesive decorative film, templates, plywood: 13 x 110 x 0,6 mm, white acrylic paint, pencil, small plastic costmetic bags. tesafilm®; tesa Powerstrips® waterproof strips, large; 2 tesa Powerstrips® waterproof toothbrush holder Zoom metal; 2 tesa Powerstrips® waterproof hooks Zoom metal; tesa Powerstrips® waterproof razor holder Zoom metal.

DIY Bathroom Hook Rack / Step 2: Paint
02

Paint the board with the white acrylic paint.

DIY Bathroom Hook Rack / Step 3: Paint
03

Prepare the stencils: Print out the pictogram, write your names on the computer in your chosen font and size and print them out. Cut out the templates, attach a matching strip of decorative film to the cutting surface with Tesafilm; attach names and pictogram to the decorative film with Tesafilm and carefully cut them out with the cutter.

DIY Bathroom Hook Rack / Step 4: Stick
04

Test out the position of the pictogram, names and hooks for toothbrushes and razors on the board and mark them lightly in pencil. Then remove the protective strip from the decorative film. Attach pictogram and names.

DIY Bathroom Hook Rack / Step 5: Remove film
05

Now attach the tesa Powerstrips® waterproof razor holder Zoom metal. Remove the protective strip from one side of the Powerstrip and press the Powerstrip directly onto the board in the desired position with the red line facing downwards. Press down firmly for five seconds.

DIY Bathroom Hook Rack / Step 6: Apply hook
06

Remove the second protective strip, take the transparent base plate out of the razor holder and attach the flat side above the red line. Press down firmly for at least five seconds. Place the razor holder on the base plate and slide it down until it clicks into place.

DIY Bathroom Hook Rack / Step 7: Strip
07

Install the board on the wall according to the instructions on the packaging of the tesa Powerstrips® waterproof strips, large. Follow these instructions to install the hooks for the bags on the tiles below the rack: On a spot that has been thoroughly cleaned, use the included primer cloth to wipe the tiles. Wait 10 seconds.

DIY Bathroom Hook Rack / Step 8: Apply
08

Remove the protective strip from one side of the Powerstrip and press the Powerstrip directly onto the tiles in the desired spot with the red line facing downwards. Press down firmly for five seconds. Remove the second anti-adhesive strip, take the transparent base plate out of the hook and attach the flat side above the red line; press down firmly for at least five seconds.

DIY Bathroom Hook Rack / Step 9: Finish
09

Place the hook on the base plate and slide it down until it clicks into place.