01
We need: a variety of narrow white frames in different sizes, your image – a print, wallpaper or map, a metre rule or yardstick, scissors, pencil, tesa® adjustable adhesive nail wallpaper & plaster 1kg, deco tape – choose your favorite design
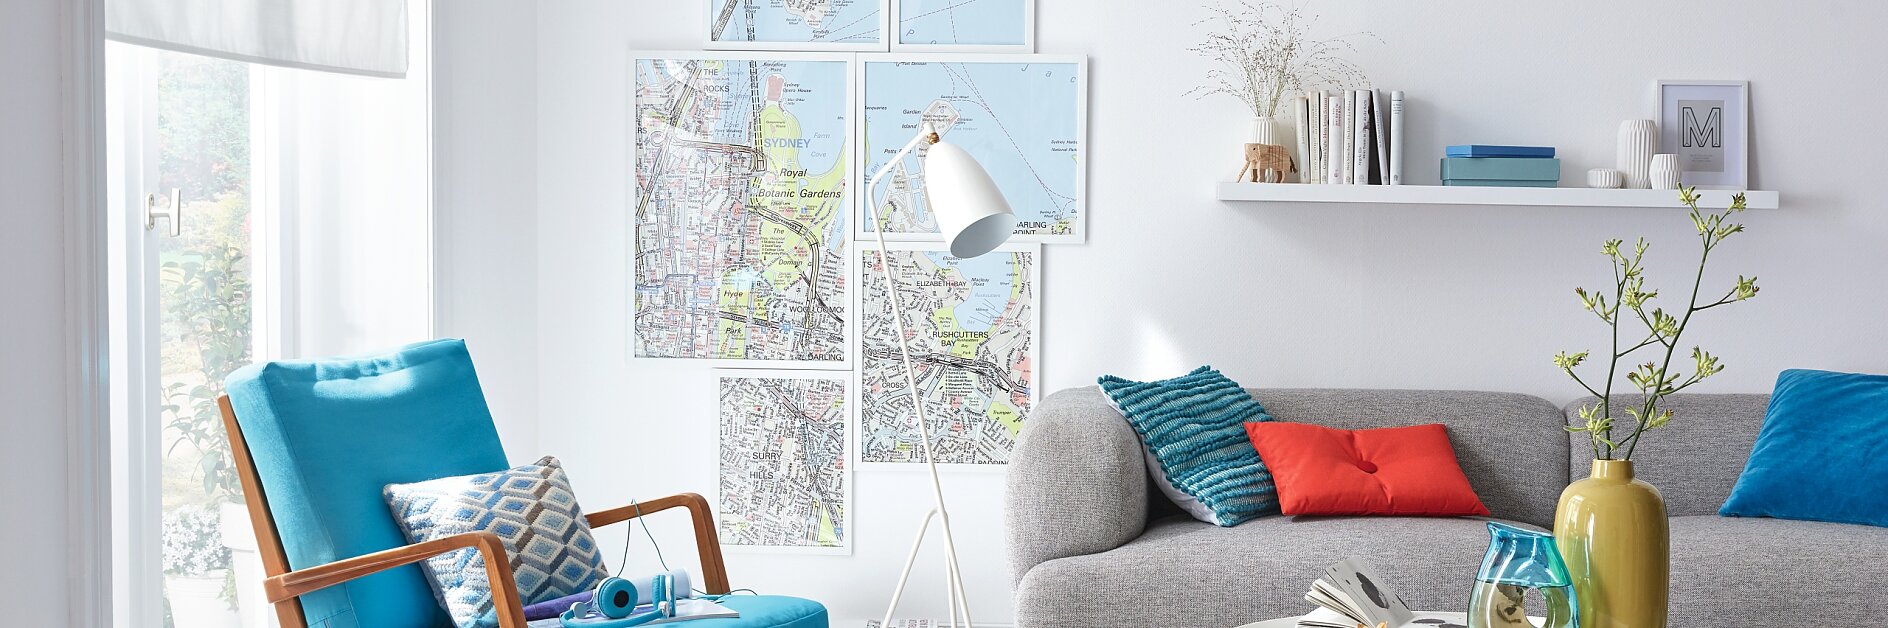
Having a statement piece of art in your home doesn’t have to be expensive. This multi piece wall art is quick to make and wall-mount. And the best thing? You won’t see another one like it anywhere else.
Multi piece wall art DIY

We need: a variety of narrow white frames in different sizes, your image – a print, wallpaper or map, a metre rule or yardstick, scissors, pencil, tesa® adjustable adhesive nail wallpaper & plaster 1kg, deco tape – choose your favorite design

The first task of creating your multi piece wall art is to work out what parts of the image will appear in each frame. Spread out your picture on the floor to make it easier. If you’re using wallpaper, use some transparent tape to join the individual strips together before you design your piece.

Use small strips of deco tape to mark the frames – so that you can easily match up the design when you hang them. Stick each strip at an angle across two frames and cut with scissors.

Use a pencil to trace around the outer edge of each frame. This is the key to getting a perfect match on the image when the piece is hung on the wall.

Now do the same with the corresponding frame backs – this line will be where you cut the image.

Now use the scissors to carefully cut out the image pieces along the inner lines.

Put each piece of the image into the corresponding frame.

Mark the position of each piece on the wall, then attach the tesa® adjustable adhesive nails for wallpaper & plaster 1kg according to the instructions in the pack. You can make fine adjustments to the position of each frame after attachment. Use the tape markings to accurately line up the images with each other. And that’s it! Enjoy your art.

This large, striking collection of frames is a clever way to create an eye-catching piece of art in your home. The image is your choice. Go for a large print, map or even a boldly design wallpaper that you love.
