Elegant home made packages

Elegant folded cartons

Sometimes appearances do matter: Like in this crafted carton for instance, where home-baked cookies become an even more heartfelt gift.

Level of difficulty Leisurely inspiration
Duration 45

We need:

sturdy paper for the stencil template for the carton and stars white and green cardboard (cardstock) wrapping paper with a gray design transparent film scissors pencil ruler cutter folding tool hole punch satin ribbon 0.6 cm small bell tesa Easy Stick®ecoLogo tesa® spray glue PERMANENT

How to do it:

DIY Elegant Folded Cartons / Step 1: Overview
01

Collect all items and let's start!

DIY Elegant Folded Cartons / Step 2: Extend template
02

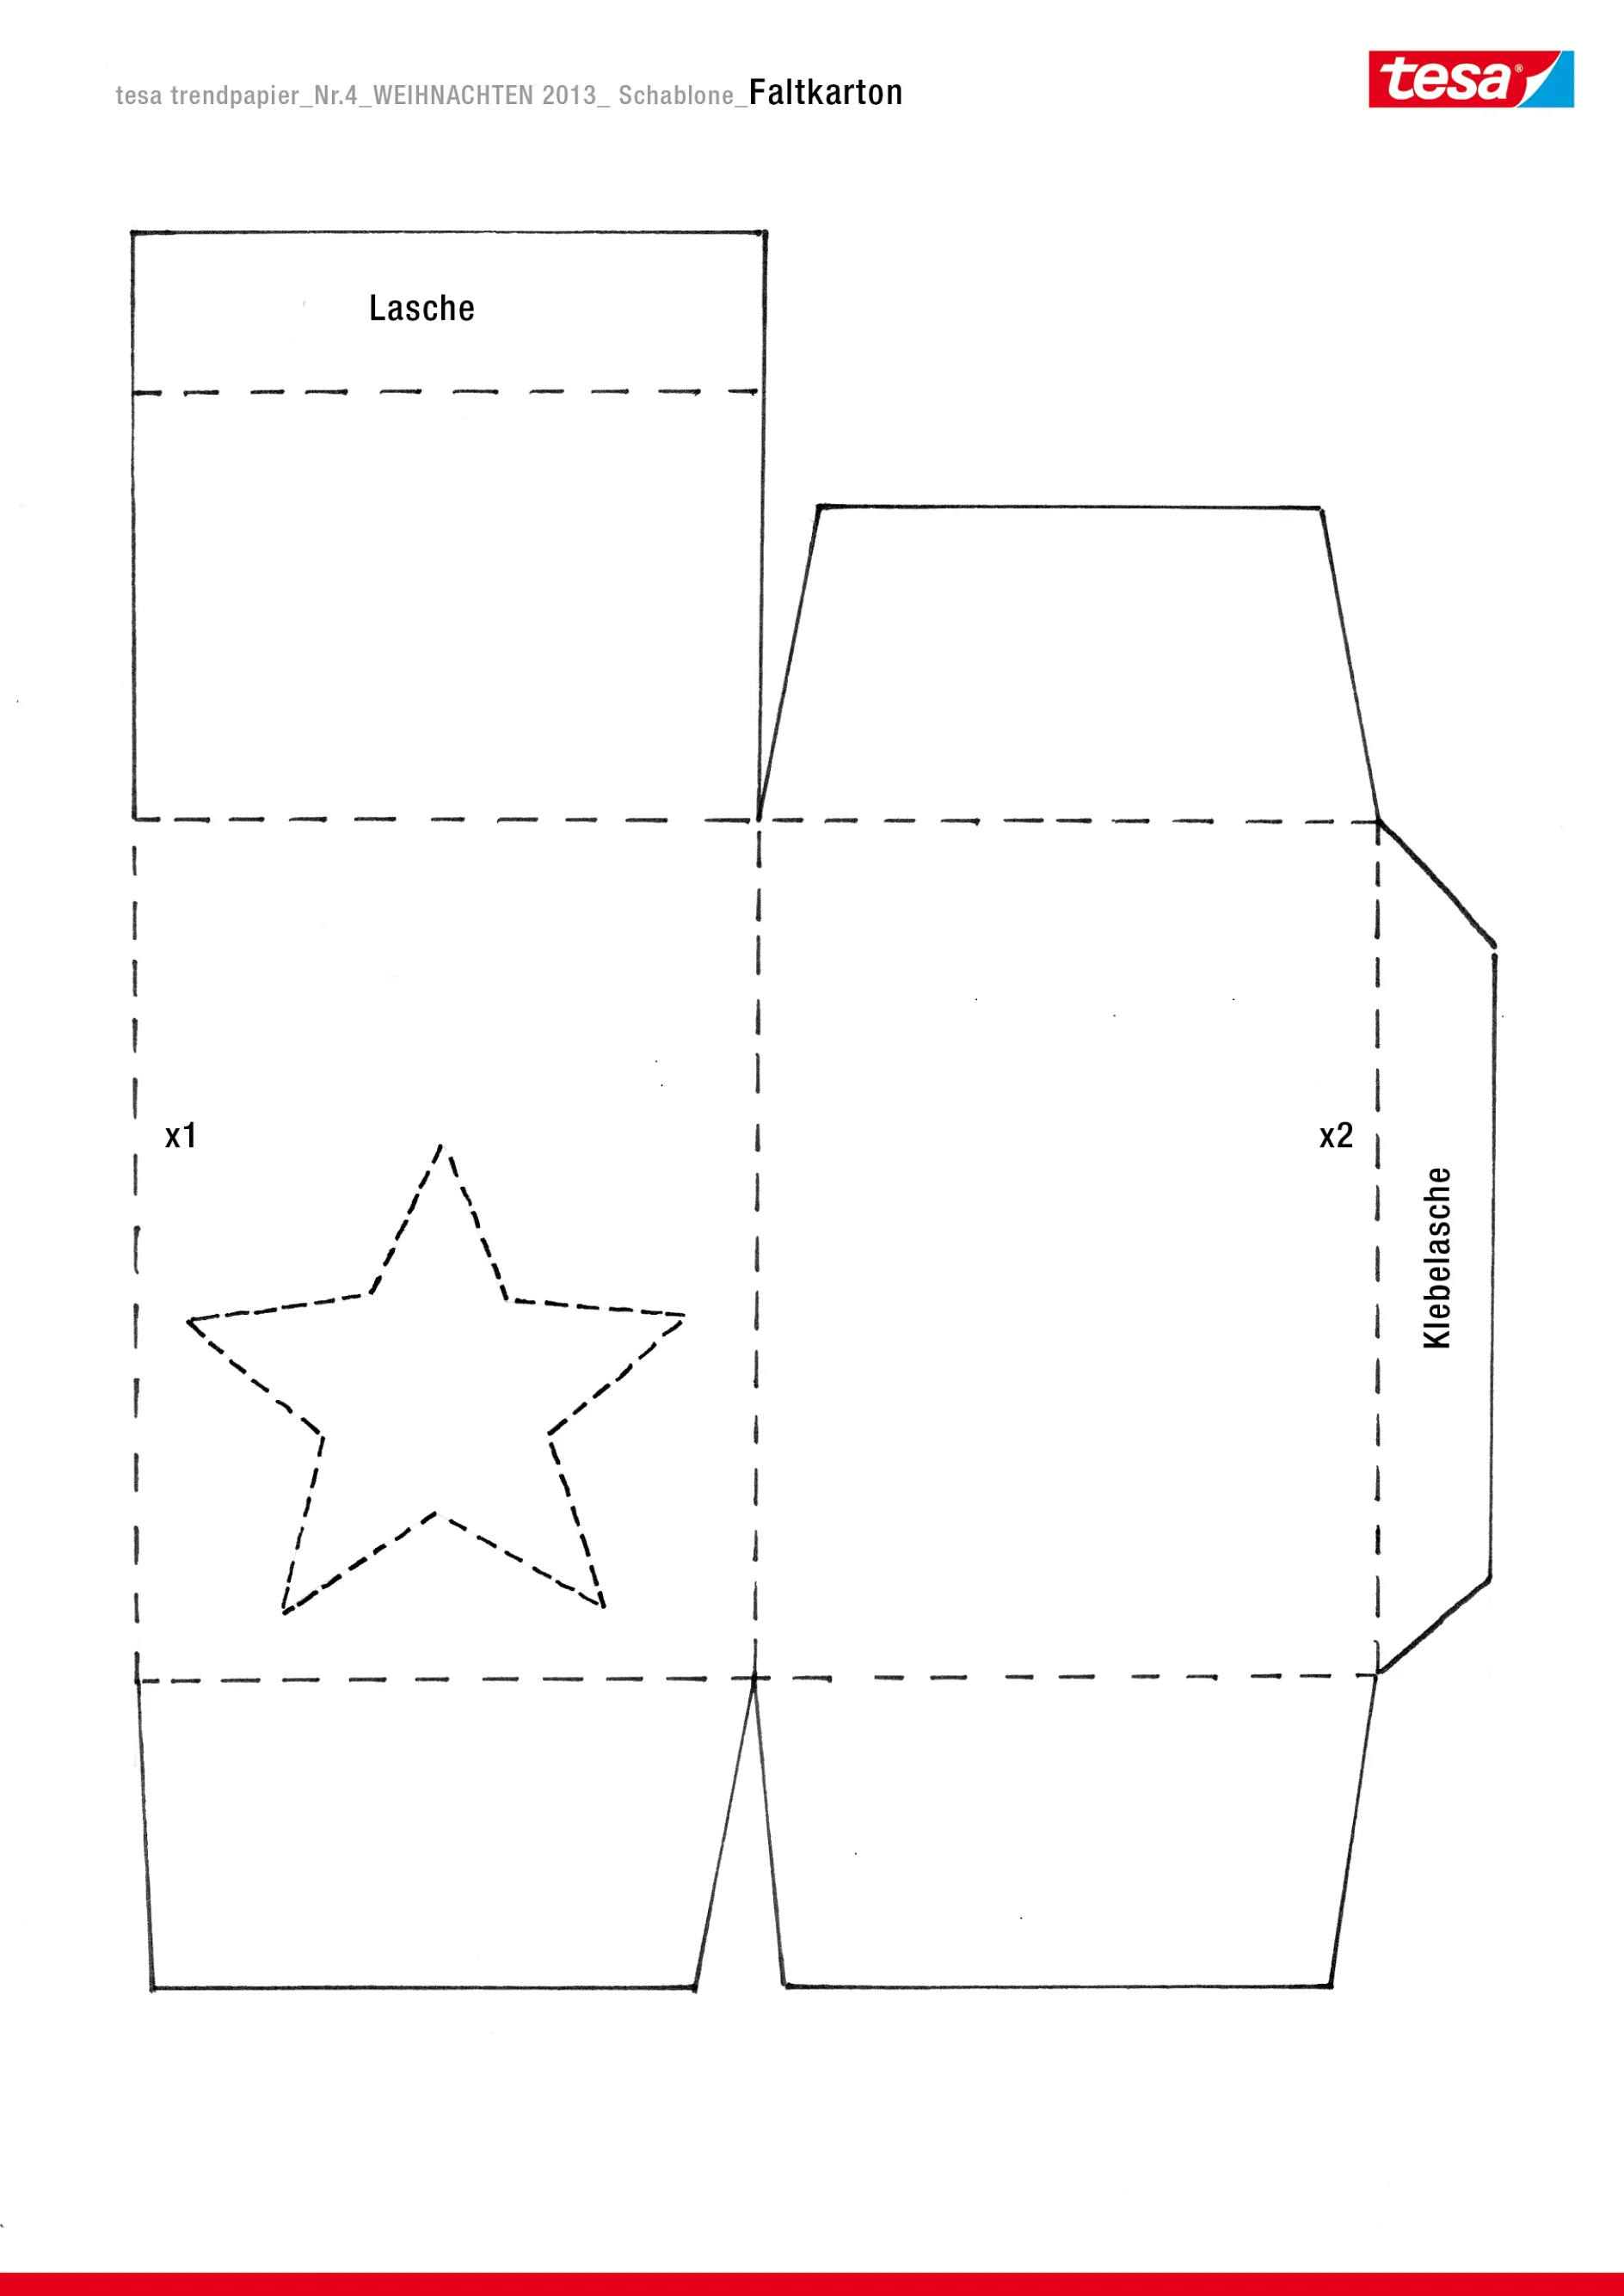
Extend the template as follows: Trace both side elements again without glue flaps, side X1 on X2. Preparation: For each carton, cover a 25 x 38 cm piece of white cardboard with wrapping paper. To do so, spray a piece of white cardboard with spray glue, then apply a same-sized piece of wrapping paper and press it down flat. Trace the outside edges of the stencil onto the white backside, then trace the dottedd inside lines. Cut out the carton along the outside edges. Preparation: For each carton, cover a 25 x 38 cm piece of white cardboard with wrapping paper. To do so, spray a piece of white cardboard with spray glue, then apply a same-sized piece of wrapping paper and press it down flat.

DIY Elegant Folded Cartons / Step 3: Cut out carton
03

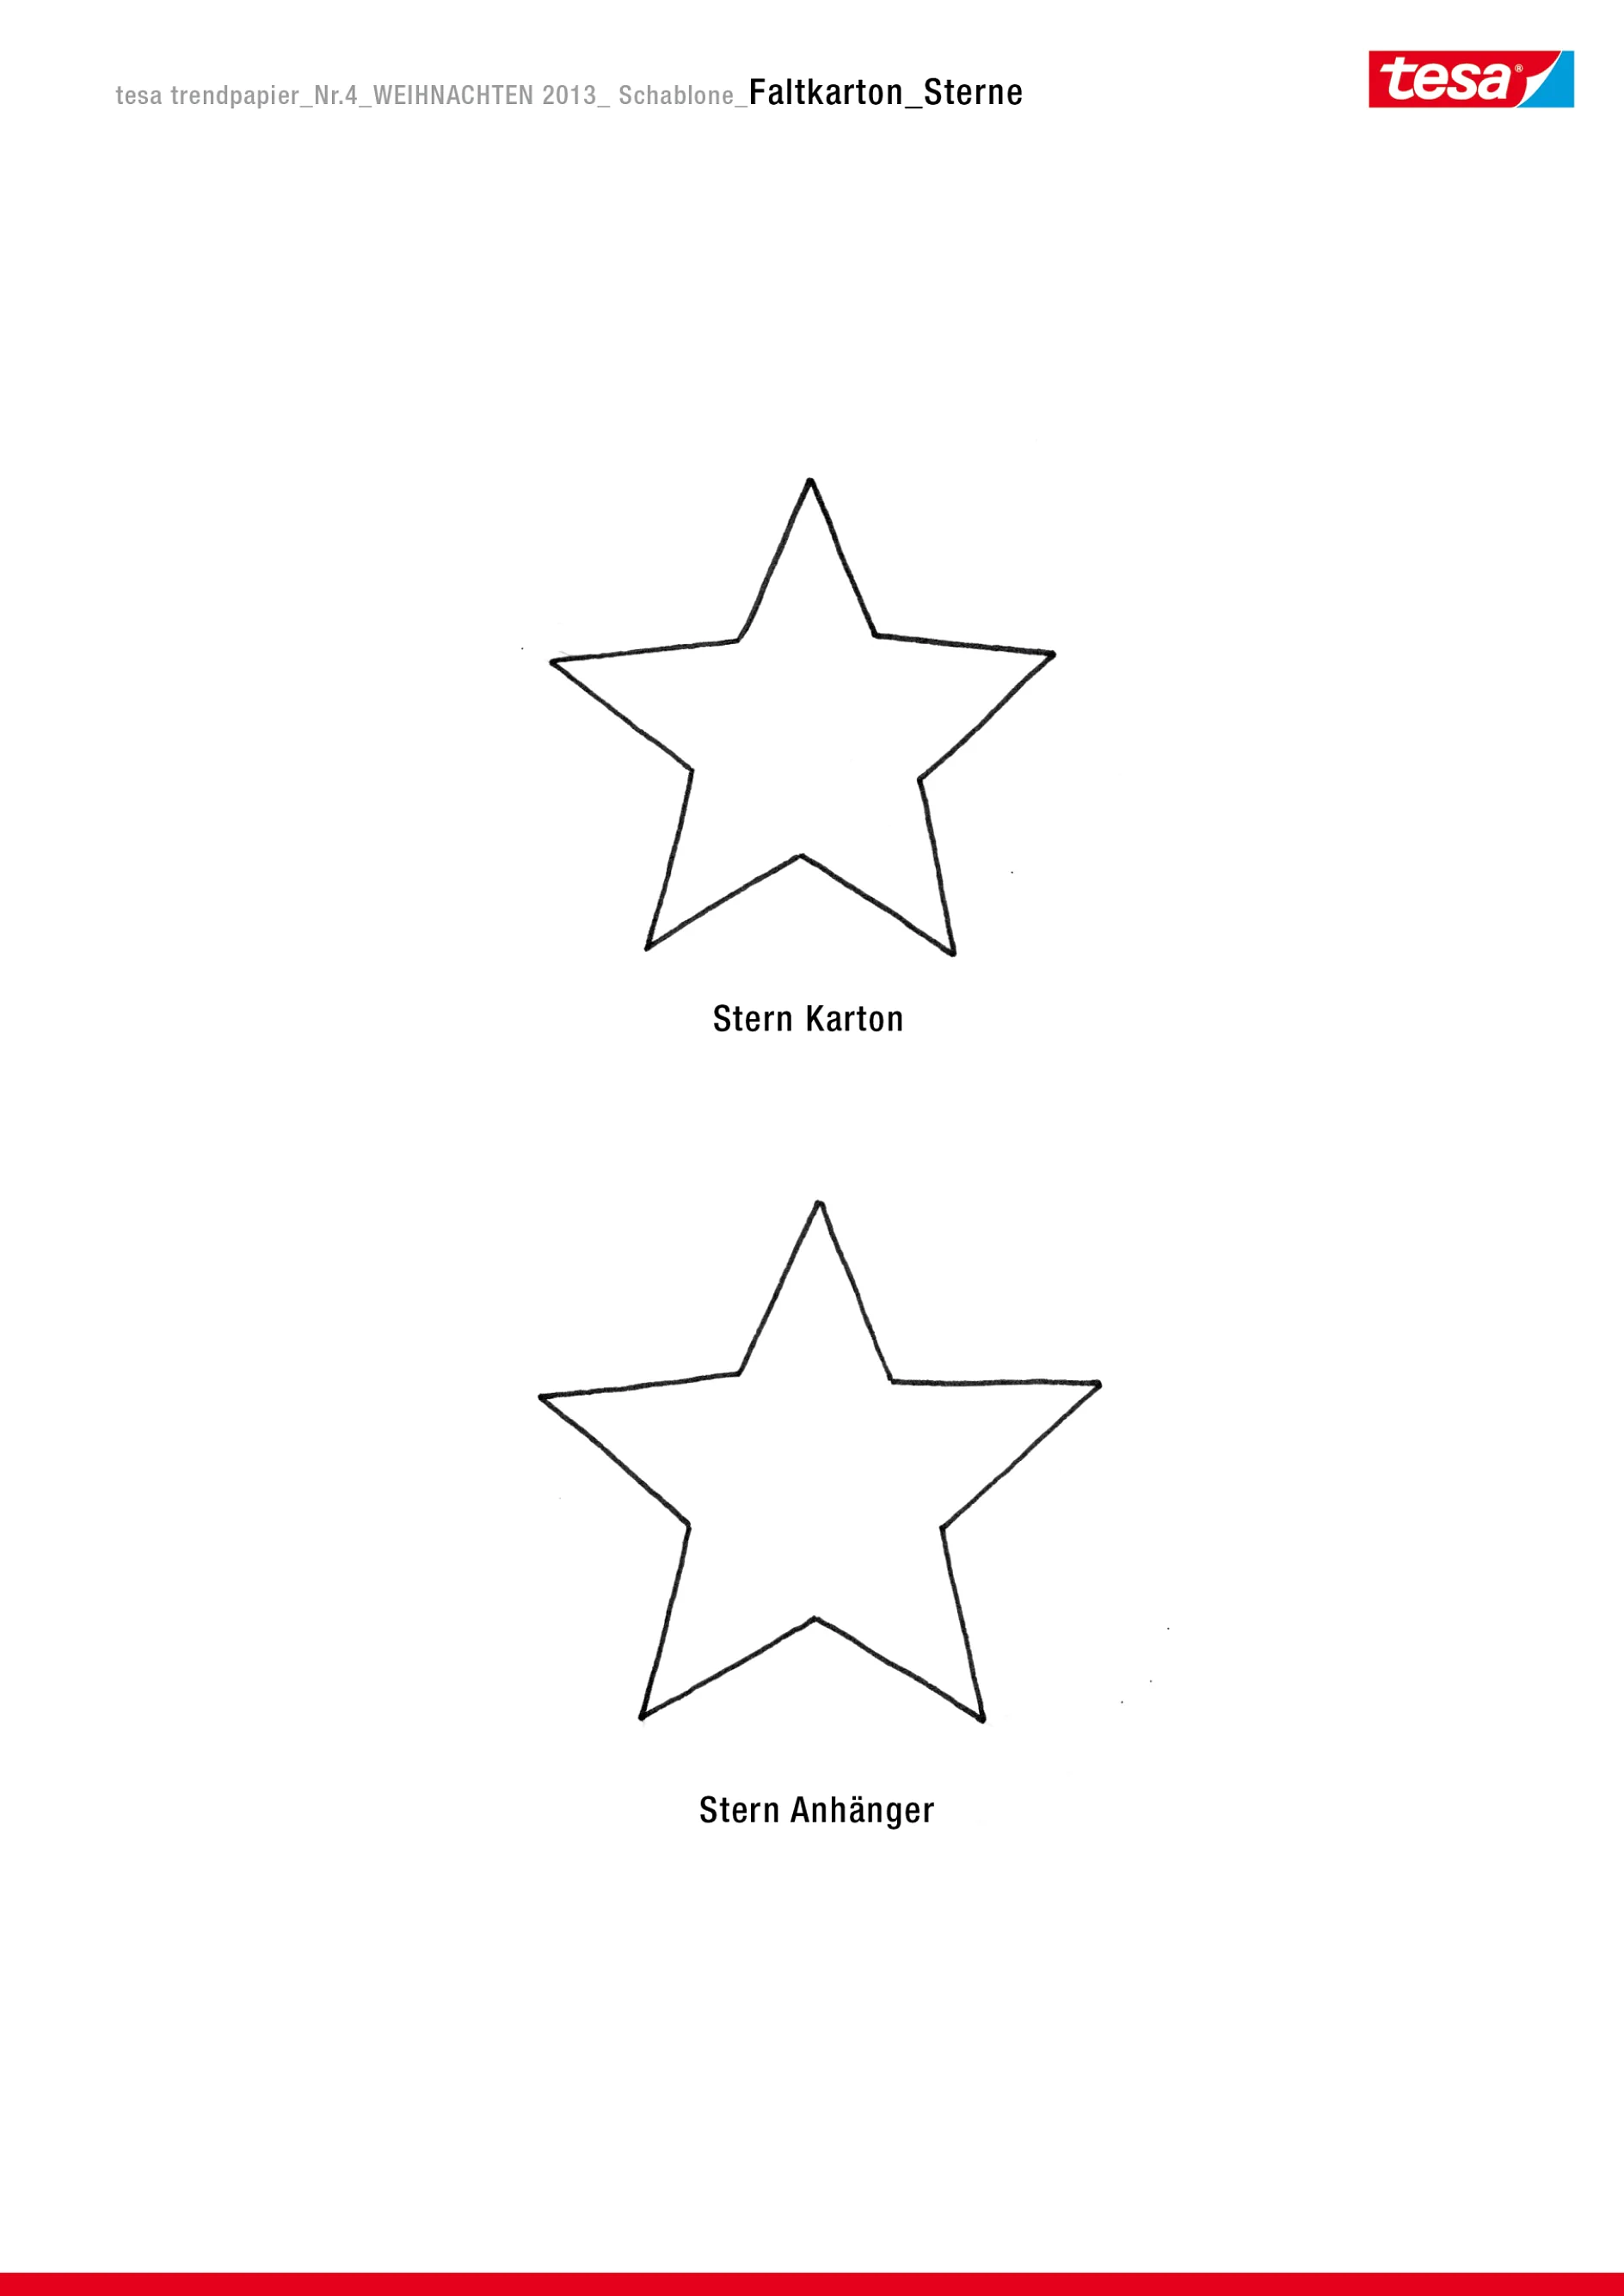
Cut out the carton along the outside edges. The height of the carton can be varied; the cover and base can't be. Use the star stencil to trace the star.

DIY Elegant Folded Cartons / Step 4: Cut out star
04

Cut out the star with the cutter. Save the star; it can be used later as a gift card.

DIY Elegant Folded Cartons / Step 5: Apply Easy Stick
05

Apply the tesa Easy Stick®ecoLogo along the outside lines of the star.

DIY Elegant Folded Cartons / Step 6: Glue on the transparent film
06

Glue on a piece of transparent film.

DIY Elegant Folded Cartons / Step 7: Cut out the triangles
07

Cut out the triangles along the dotted lines.

DIY Elegant Folded Cartons / Step 8: Fold the cover and base elements
08

Fold the cover and base elements of the carton inwards.

DIY Elegant Folded Cartons / Step 9: Go over the folds with the folding tool
09

Go over the folds with the folding tool. Then fold the long sides of the carton inwards.

DIY Elegant Folded Cartons / Step 10: Fold the flaps outwards
10

Fold the flaps on both top elements outwards.

DIY Elegant Folded Cartons / Step 11: Apply tesa Easy Stick®ecoLogo
11

Apply Easy Stick®ecoLogo to the side flaps, then glue the carton together.

DIY Elegant Folded Cartons / Step 12: Push out the flaps
12

Hold the flaps in place, pushing them outwards – fold over the base and glue the corners.

DIY Elegant Folded Cartons / Step 13: Lay the top flaps on top of one another
13

Lay the top flaps on top of one another and make 2 holes side by side in the middle.

DIY Elegant Folded Cartons / Step 14: Cut out the star
14

Cut a star out of the green cardboard, a bit bigger than the white one. Align them at one of the points and punch a hole. Thread the satin ribbon from behind and pull it through the holes in the cardboard. Attach the star gift cards and bells and make a bow.

tesa products required for this project