Wall tray with vases

Wall tray with vases

This wall decoration is made up of single trays; glass tubes are attached to them, serving as flower vases. Funny: Postcards and photos are fixed to the tray using patterned tesa® Deco Tape; it looks very decorative, but can easily be removed again.

Level of difficulty Leisurely inspiration
Duration 60

We need:

Papier-mâché trays (craft supplies) craft paints in different pastel colors brush satin ribbons 3mm small glass tubes scissors small pointed scissors pencil small pictures or postcards tesa® Deco Tape tesa Powerstrips® LARGE

How we do it:

DIY Wall Tray Step 1: Overview

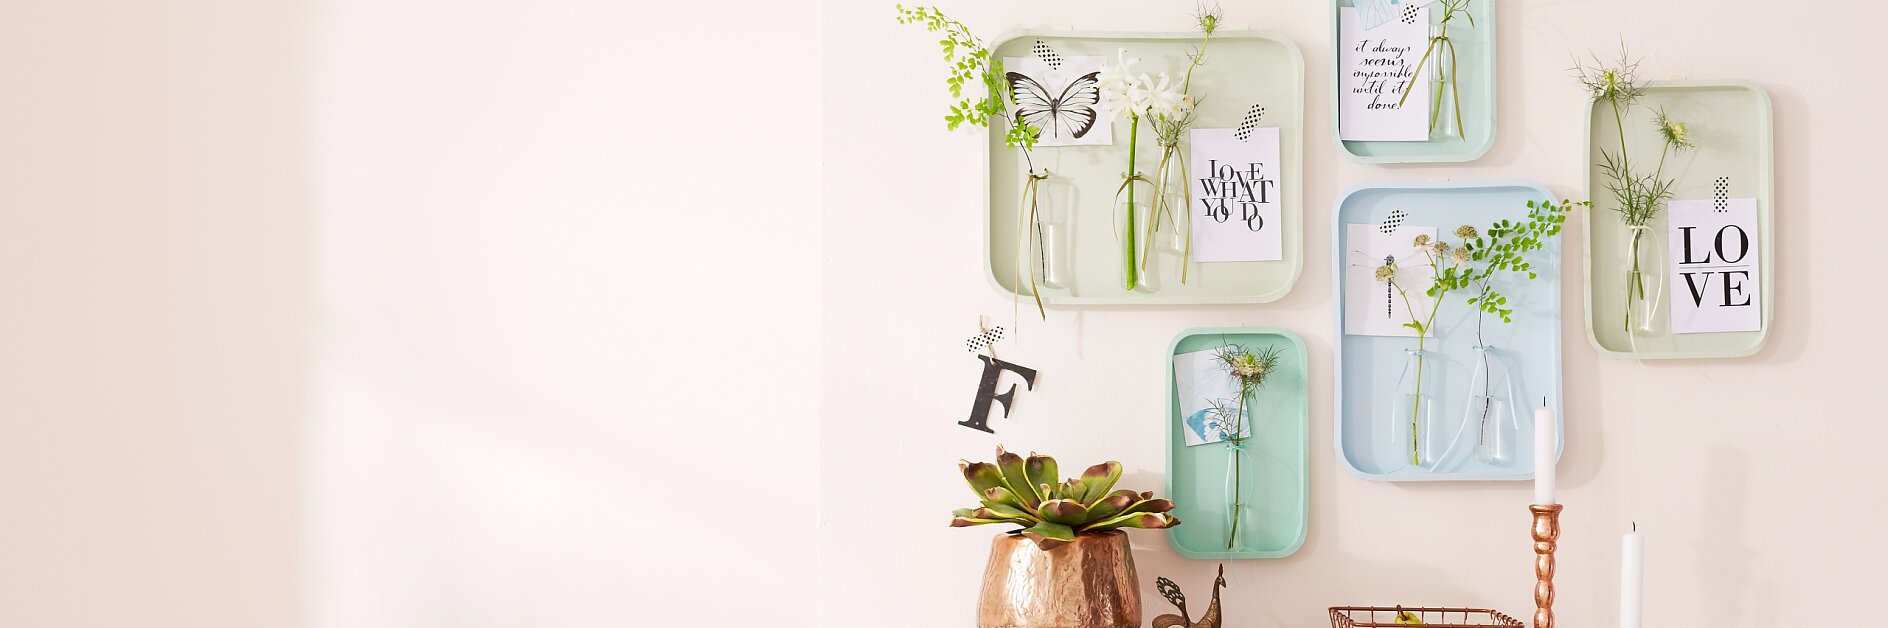
01Papier-mâché wall trays with flowers / Step 1

We need: Papier-mâché trays (craft supplies), craft paints in different pastel colors, brush, satin ribbons 3mm, small glass tubes, scissors, small pointed scissors, pencil, small pictures or postcards, tesa® Deco Tape, tesa Powerstrips® LARGE

DIY Wall Tray Step 2: Paint

02Papier-mâché wall trays with flowers / Step 2

Paint the trays in different colors.

DIY Wall Tray Step 3: Position Glass Tubes

03Papier-mâché wall trays with flowers / Step 3

Position the glass tubes as desired; on the upper opening, mark both sides on the tray.

DIY Wall Tray Step 4: Scissor

04Papier-mâché wall trays with flowers / Step 4

Using the pointed scissors, punch two small holes into the tray.

DIY Wall Tray Step 5: Ribbon

05Papier-mâché wall trays with flowers / Step 5

Pull the satin ribbon through the holes from the backside of the tray and fix the vase by knotting the ribbon firmly.

DIY Wall Tray Step 6: Use Powerstrip®

06Papier-mâché wall trays with flowers / Step 6

Remove one protective film from the Powerstrip®. Firmly press the Powerstrip® at least five seconds on the desired spot on the backside of the tray. Make sure that the latch protrudes on the edge. Do not remove the protective film with the red line on the latch.

DIY Wall Tray Step 7: Remove protective film

07Papier-mâché wall trays with flowers / Step 7

Remove the second protective film.

DIY Wall Tray Step 8: Applying

08Papier-mâché wall trays with flowers / Step 8

Before applying the Powerstrip, clean and dust the surface thoroughly. Firmly press the tray for at least five seconds to the wall. For larger trays, please use two Powerstrips. Fix postcards and photos using tesa® Deco Tape. Fill water into the glass tubes and arrange the flowers in them.