01
Collect all required items and let's start!
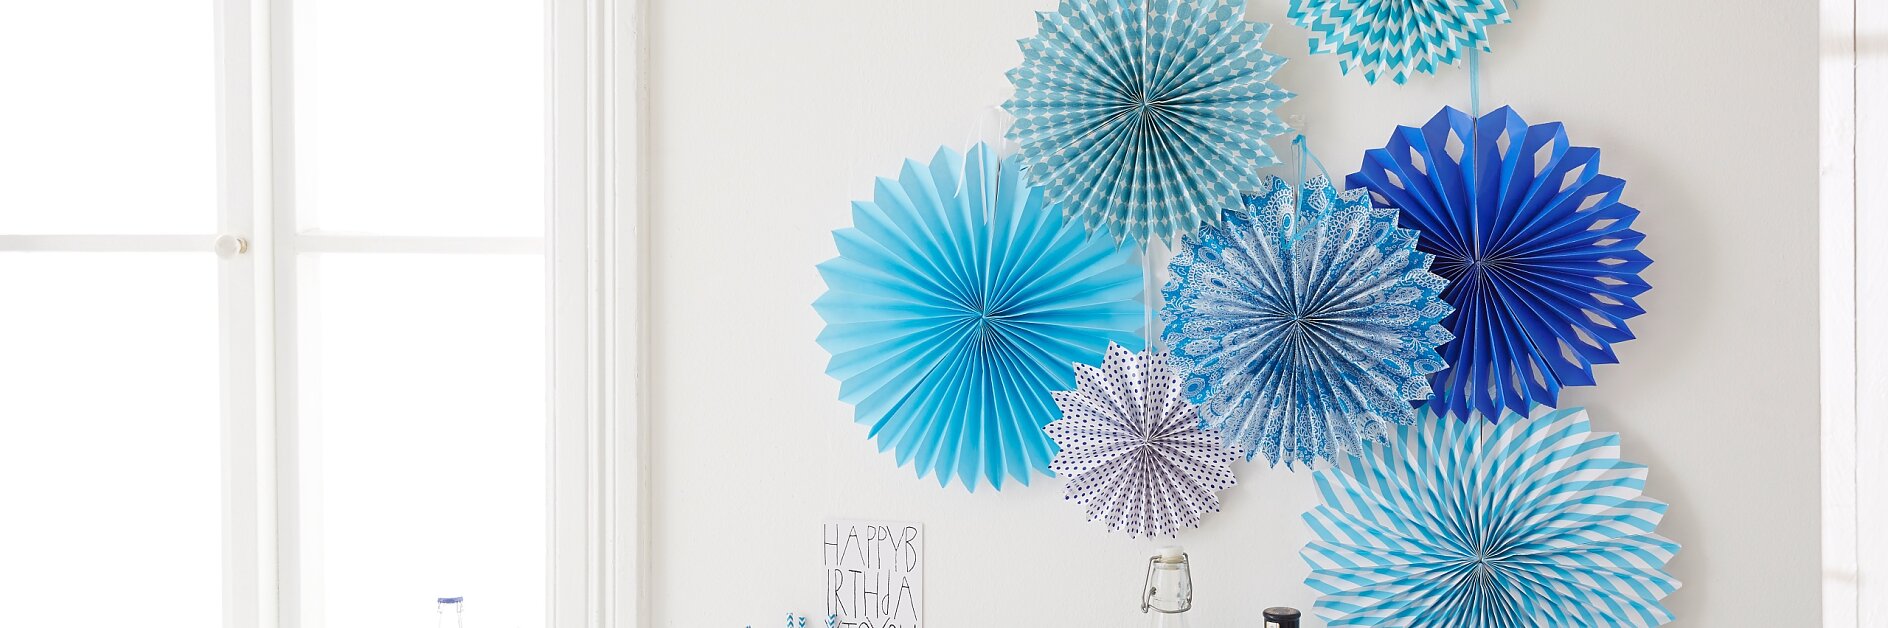
Interior decorating: The birthday party decorations "paper rosettes" are easily mounted with the picture hangers tesa Powerstrips® Transparent DECO Hooks Large.

Collect all required items and let's start!

Per rosette, cut out 3 squares, for example, 28 x 28 cm, 20 x 20 cm (measures should be divisible by 2). Fold all squares in 2-cm intervals, like an accordion. If you find it difficult to fold the paper free hand, mark thin lines using a pencil. Fold the resulting strip once in the middle. Then, cut off the tips diagonally.

Glue the strips together in the middle.

Spread some glue also on the edges, and stick together all three parts, creating a fan.

From the white cardboard, cut off two strips - 2 cm wide x length of the fan - and glue them on the outer edges. Cut off any protruding corners.

Unfold the rosette and fix the backside with a paper clip. Then, punch a hole at the top of the opening through both parts.

Pull the ribbon through the holes.

Before applying the Powerstrip®, thoroughly clean the surface with rubbing alcohol or a silicone-free multi-purpose cleaner.

Peel-off the Powerstrip® from the sheet. Place it on the surface and press firmly for at least five seconds. Remove the printed protective film.

Firmly press the hook for at least five seconds on the strip. Do not press on the latch. Finally, tie the ribbon with the rosette to the hook
