tesa_Powerbond_childrens_room_brand_v2.jpg

Kids' Shelving Unit

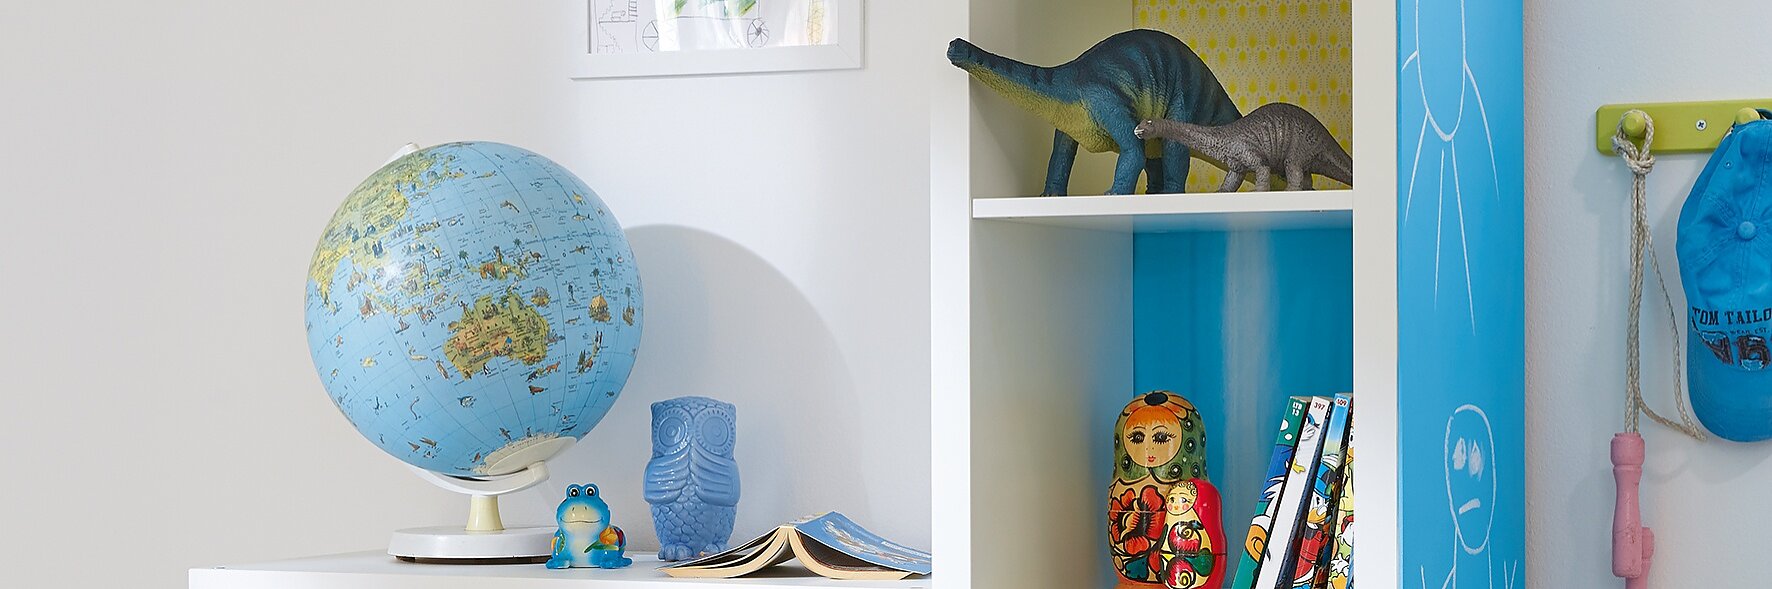
Here's an idea that kids will love. Each shelf has its own background, using decorative paper, stuck with tesa® Spray Glue PERMANENT, and on the side of the unit, there's a big blackboard so they're free to write or paint.

Level of difficulty For ambitious hands
Duration 20

We need:

Shelves of different sizes preferably with square compartments 3 mm deep MDF panels (cut to the size of the shelf backs) a 3 mm HDF panel painted white on one side (for the blackboard, cut to the size of the shelf side) chalkboard paint a paint roller scissors utility knife pencil ruler decorative paper alcohol- or silicone-free glass cleaner tesa® Spray Glue PERMANENT tesa® Powerbond ULTRA STRONG 5 m x 19 mm (2 rolls)

How we do it:

Shelves of different sizes, preferably with square compartments, 3 mm deep MDF panels (cut to the size of the shelf backs), a 3 mm HDF panel painted white on one side (for the blackboard, cut to the size of the shelf side), chalkboard paint, a paint roller, scissors, utility knife, pencil, ruler, decorative paper, alcohol- or silicone-free glass cleaner, tesa® Spray Glue PERMANENT, tesa Powerbond® ULTRA STRONG 5 m x 19 mm (2 rolls)
01

Collect all items and let's start!

For the blackboard, paint the non-white side of HDF panel - plus the edges - with chalkboard paint. Leave to dry.
02

For the blackboard, paint the non-white side of HDF panel - plus the edges - with chalkboard paint. Leave to dry.

Thoroughly clean the side surface of the shelf unit with alcohol- or silicone-free glass cleaner.
03

Thoroughly clean the side surface of the shelf unit with alcohol- or silicone-free glass cleaner.

Apply tesa Powerbond® ULTRA STRONG strips evenly and vertically – approx. 20 cm long – along the full height of the unit and press firmly in place for five seconds.
04

Apply tesa® Powerbond ULTRA STRONG strips evenly and vertically – approx. 20 cm long – along the full height of the unit and press firmly in place for five seconds.

Remove protective films.
05

Remove protective films.

Firmly press the blackboard onto the unit for five seconds.
06

Firmly press the blackboard onto the unit for five seconds.

Measure the shelf spaces and draw them onto the smooth sides of the HDF panels. This will be the area covered by the decorative paper. Be careful though - in order to allow for the panels to be attached to the shelves vertically and horizontally you will need to allow a further 2cm on the outer edges. This is where the Powerbond® ULTRA STRONG double-sided adhesive tape will be applied later.
07

Measure the shelf spaces and draw them onto the smooth sides of the HDF panels. This will be the area covered by the decorative paper. Be careful though - in order to allow for the panels to be attached to the shelves vertically and horizontally you will need to allow a further 2cm on the outer edges. This is where the tesa® Powerbond ULTRA STRONG double-sided adhesive tape will be applied later.

Cut your paper to match the pencilled areas and spray the back sides with tesa® Spray Glue PERMANENT
08

Cut your paper to match the pencilled areas and spray the back sides with tesa® Spray Glue PERMANENT

Glue the papers onto the marked areas and smooth out.
09

Glue the papers onto the marked areas and smooth out.

Apply tesa Powerbond® ULTRA STRONG double-sided tape onto the previously cleaned edges.
10

Apply tesa Powerbond® ULTRA STRONG double-sided tape onto the previously cleaned edges.

Cut to fit.
11

Cut to fit.

Firmly press onto all the HDF panel edges for five seconds.
12

Firmly press onto all the HDF panel edges for five seconds.

Remove protective films.
13

Remove protective films.

Clean the surfaces of the shelves with alcohol- or silicone-free glass cleaner.
14

Clean the surfaces of the shelves with alcohol- or silicone-free glass cleaner.

Firmly press all HDF panels onto the backs of the shelves for five seconds.
15

Firmly press all HDF panels onto the backs of the shelves for five seconds.

tesa products required for this project