01What We Need:
We need a table lamp, some pongee silk (Japanese silk), a ruler, a box cutter, a cutting board, a pencil, a triangular stencil 21 cm by 3 cm, and tesa Glue Stamp ecoLogo®.
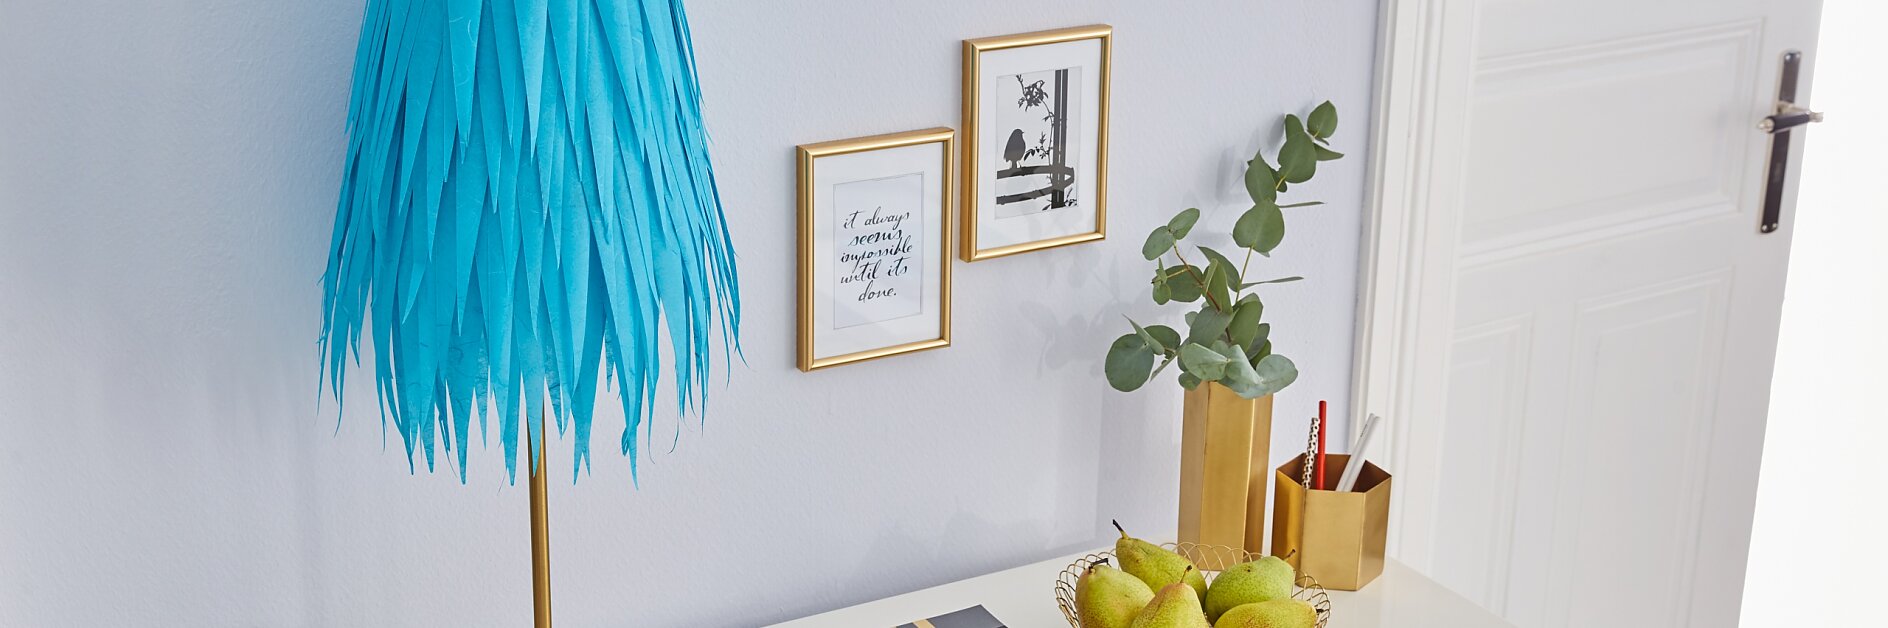
With our ideas, even creating an individualized lampshade is child’s play. Are you curious how to put together a DIY lampshade? This way, please! In just a few steps, you can turn a conventional table lamp into a designer light, thus giving the atmosphere of your living space a very personal touch.
DIY Lampshade - How We Do It

We need a table lamp, some pongee silk (Japanese silk), a ruler, a box cutter, a cutting board, a pencil, a triangular stencil 21 cm by 3 cm, and tesa Glue Stamp ecoLogo®.

Put together triangular stencil in the above size. Cut off a piece of pongee silk and fold it in several layers. Place the stencil on the fabric and draw triangles with the pencil.

Cut out triangles with the box cutter and the ruler.

Stamp the glue in the centre on top of the triangles.

Glue the triangles in rows next to each other on the lampshade, starting at the bottom. Apply a good amount of pressure. Glue the rows 4 cm apart and offset. Glue the last row double, on top of each other, to allow the light to shine evenly through the DIY lampshade.
Enjoy your tailored lampshade!