01Nettoyer la surface
Nettoyer votre surface avec un chiffon propre garantira une adhésion optimale. Testez toujours la capacité de charge de votre surface avant.
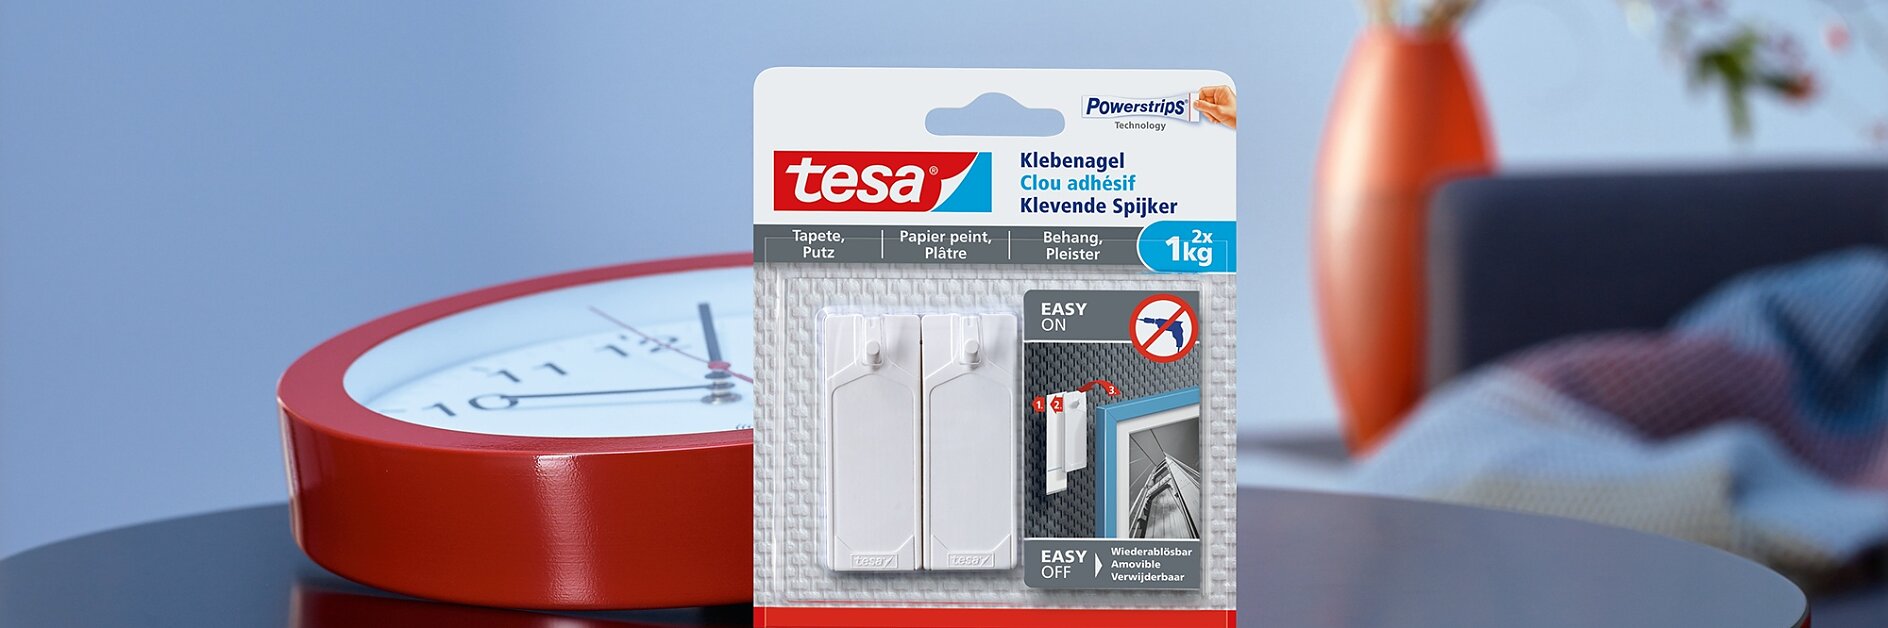
la méthode simple et rapide pour fixer ou accrocher vos objets sur des surfaces texturées et délicates
Cliquez sur les onglets de cette vidéo étape par étape pour voir la rapidité et la facilité avec lesquelles vos projets peuvent prendre vie.
Jetez un œil à notre tutoriel étape par étape pour voir la rapidité et la facilité avec lesquelles vous pouvez accrocher vos objets en utilisant un clou adhésif, sans marteau bruyant, sans salissures et sans tracas. Ce produit n'est pas adapté aux surfaces suivantes: papier-peint vinyle et surfaces anti-adhérentes (par ex. le silicone, le PTFE).

Nettoyer votre surface avec un chiffon propre garantira une adhésion optimale. Testez toujours la capacité de charge de votre surface avant.

Décollez la bande adhésive en utilisant la languette, en faisant attention à ne pas toucher le côté adhésif. Appliquez la bande verticalement sur la surface, avec la languette bleue vers le bas, face au mur.

Exercez une pression sur toute la surface pendant au moins 5 secondes pour garantir l'activation de la technologie Powerstrips®.

Retirez le film protecteur présentant le logo Powerstrips®. Alignez le clou avec le bord supérieur de la bande - en vous assurant du sens du clou - puis pressez tout simplement le clou vers le bas, sur l'adhésif, juste au dessus de la ligne grise.

Appuyez fermement avec les deux pouces en haut du clou pendant 5 secondes, 5 secondes au milieu et 5 secondes en bas. Et voilà, c'est fini!

Si les têtes de cerf ne sont pas votre tasse de thé, vous pouvez utiliser les clous adhésifs pour monter ce que vous voulez, des images aux tableaux d'affichage en passant par les horloges et les petits miroirs décoratifs, que ce soit dans votre salon, votre entrée ou votre chambre. Vous pouvez utiliser deux clous pour doubler la force d'adhésion. Et comme ils sont retirables et repositionnables, vous pouvez déplacer vos objets aussi souvent que vous le souhaitez.

Il suffit de prendre la tête du clou avec une main et la languette visible avec l'autre. L'astuce est de tirer la bande adhésive doucement vers le bas, parallèlement à la surface et non en l'éloignant. Cette action défait les milliers de liens minuscules qui composent la surface adhésive, en garantissant que la surface du dessous reste propre et sans trace.