A person holds a strip of masking tesa tape, peeling it off from a larger roll. The tesa tape has text printed on it. The background shows blurred rolls of paper or tesa tape on shelves.

How to Easily Splice with tesa® EasySplice

Markets

8 quick ways to maximize your tesa® EasySplice performance

 Check out our best practice guideline and download the overview document for your reference below

A roll of gray tesa tape is partially unfurled on a white surface. The tesa tape is smooth and reflective, showing a narrow, sticky strip on each side. (This text has been generated by AI)

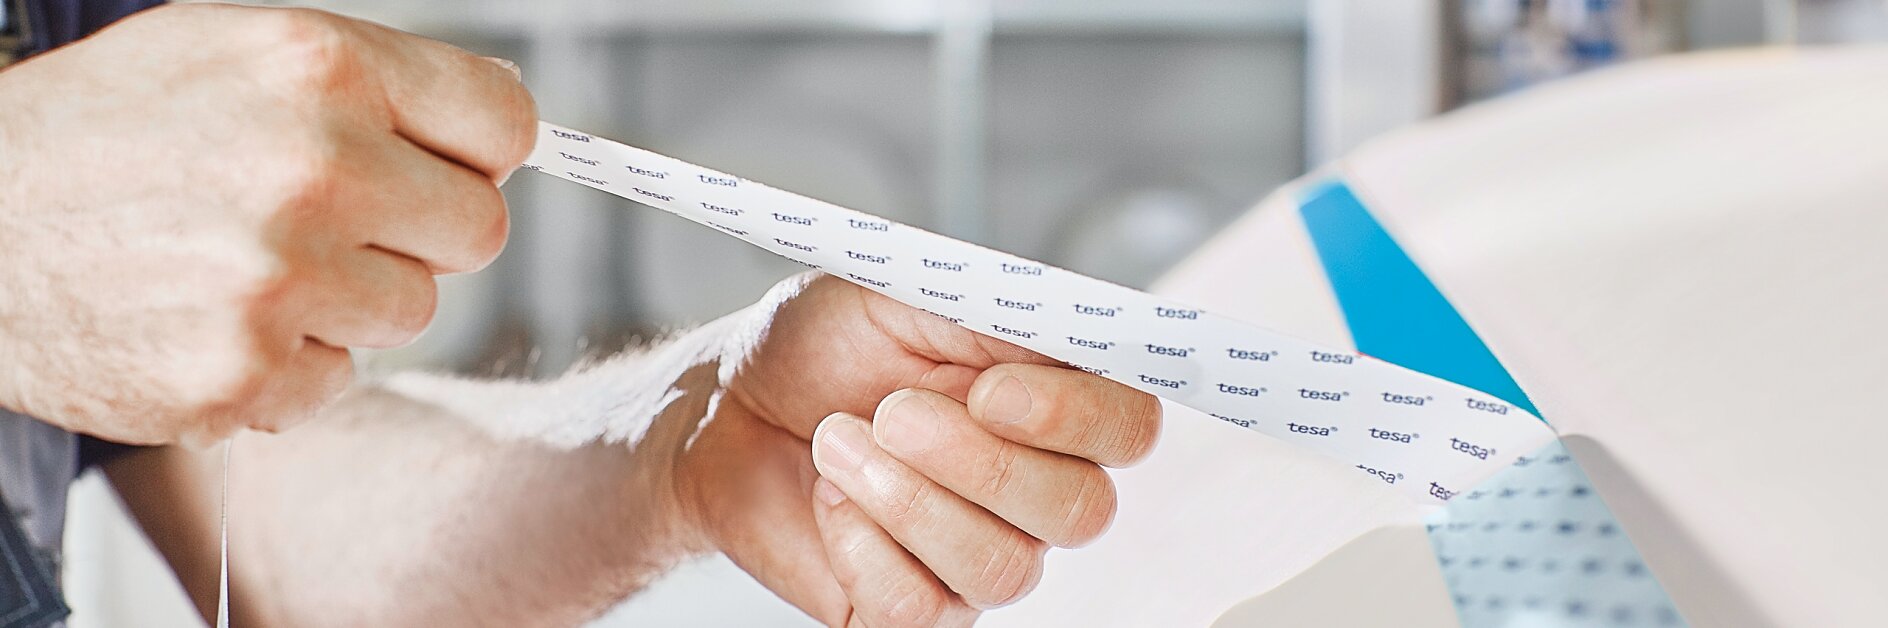
01Check splitting strip


The splitting strips are delicate parts of the product.
Make sure the splitting strip is not damaged before you apply tesa® EasySplice.

Hands holding a roll of light blue tesa tape above a white surface. (This text has been generated by AI)

02Don’t apply tape to the full width of the roll


When you apply tesa® EasySplice, leave a gap of about one thumb’s width to the edge of the roll, to avoid exposed adhesive running through the machine.

A hand holding a tesa branded scraper is smoothing or applying adhesive to a flat surface with a visible shiny strip on it. The background is plain and light-colored. (This text has been generated by AI)

03Use a squeegee


Always use a squeegee when applying tesa® EasySplice to avoid premature opening and flying snippets. 

Close-up of hands applying a blue stripe of tesa tape to a smooth white surface using a flat tool. The persons fingers hold the edge of the tesa tape, while the tool smooths it down. A roll of tesa tape is visible in the background. (This text has been generated by AI)

04Trim the edges


To avoid damage to the web, trim the paper’s edges on both sides of tesa® EasySplice to avoid air pockets underneath the unsecured edges.

Diagram showing a cutter knife, bumper roller, and a marked flag on a moving tesa tape. The tesa tape is labeled tesa EasySplice and features direction arrows for the motion. The background is light blue. (This text has been generated by AI)

05Check length of flag of the expiring web


Make sure that the flag is approximately as long as the distance between the bumper/contact roller and the knife.
This will help to have the best bond between two webs. 

Two rolls of white masking tesa tape, partially unrolled and placed on a flat surface. The left tesa tape has a plain strip, while the right tesa tape has a blue line running through the center. (This text has been generated by AI)

06Use a wider tesa® EasySplice for high speeds


For higher machine speeds, we recommend using tesa® EasySplice in a wide width to make sure there is enough adhesive contact area for a reliable splice. 

Two stylized eyes with arrows circling around them, pointing towards icons of sound waves, against a light blue background. The image suggests the concept of sound or audio perception related to eye movement. (This text has been generated by AI)

07Synchronize speeds


Make sure the speeds of the new and old reel are synchronized.
This is essential for a secure contact between the two reels. 

A strip of glossy blue tesa tape is adhered to a white surface, with one end slightly lifted. The tesa tape has a reflective sheen and appears to be in good condition. (This text has been generated by AI)

08Don’t cover the contact adhesive


Don’t cover the open contact adhesive if you use reinforcement tape or liquid glue in addition to our tesa® EasySplice.
It might negatively influence the adhesive’s performance.