01
We need: some plain white plates, porcelain paint, brushes, porcelain painting pens, wall plate holders, tesa® adhesive nail for wallpaper & plaster 1kg, masking tape
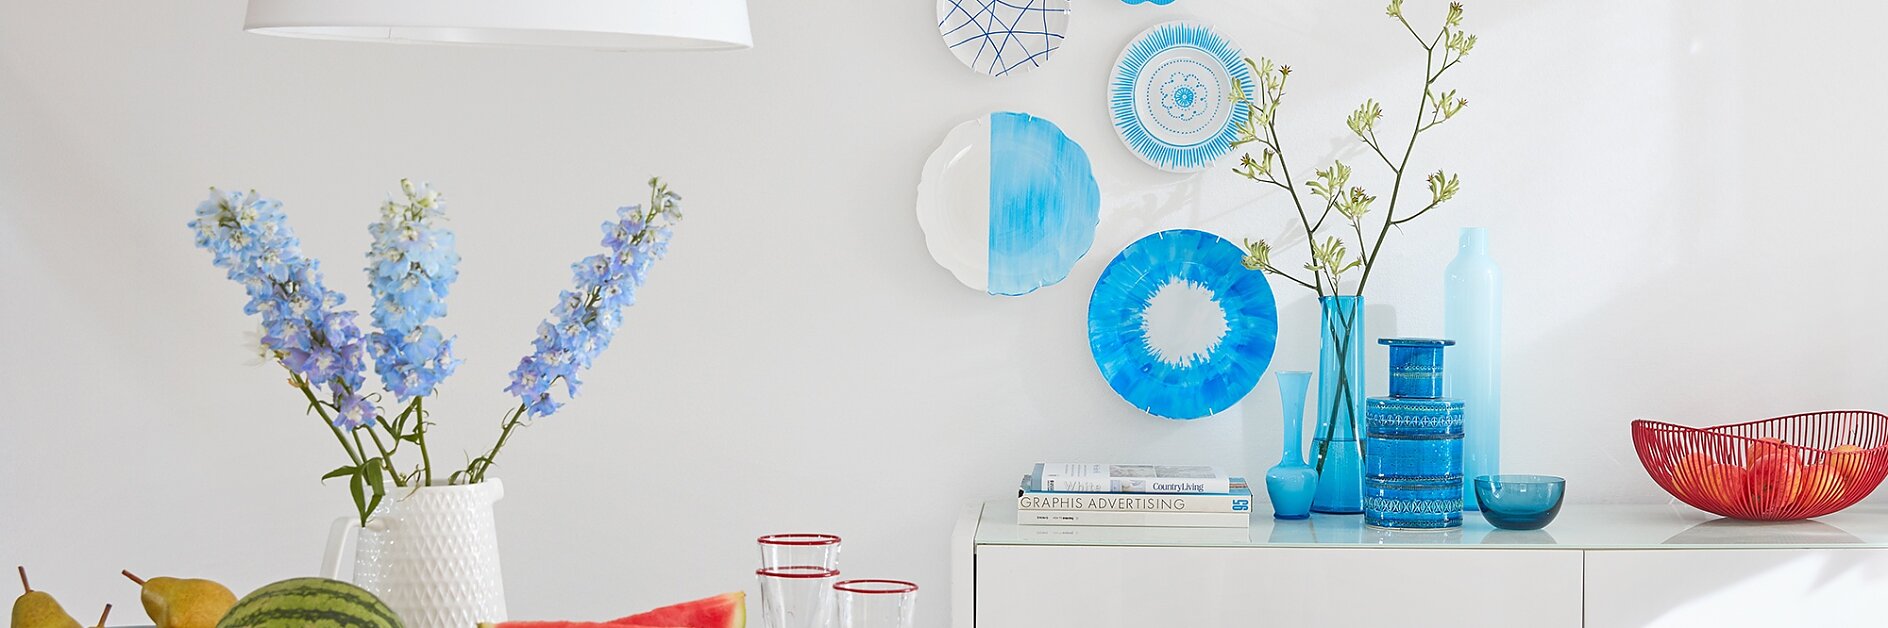
It’s time to get creative. You’ll love making this collection of decorative wall plates. Pick a colour theme and get going. It’s easy and you won’t need any tools.

We need: some plain white plates, porcelain paint, brushes, porcelain painting pens, wall plate holders, tesa® adhesive nail for wallpaper & plaster 1kg, masking tape

How you decorate the plates is entirely up to you! Use the brushes and porcelain paint to create unique designs on each plate. The masking tape is just what you need to help you create larger graphic designs.

You’ll get a pretty ‘water-colour’ effect if you give areas of the plate a light wash of colour rather than a stronger block. Use masking tape to mask off sections for a modern feel.

Let the porcelain paint dry a little before removing the masking tape. If you want the plates to be dishwasher proof, follow the instructions of the paint manufacturer.

When the plates are completely dry, use the wall plate holders and the tesa® adhesive nails for wallpaper & plaster to arrange and fix the wall plates on the wall. The adhesive nails can be removed without a trace if you feel like a change.

Make a style statement with this cluster of beautiful decorative plates!
![[en-en] PRECISION MASK SENSITIVE 50X30](/en/files/images/202402/0/medium-11172720,11172720_padded1x1_18.webp "tesa_4042448280992_04333-00019_LI400_front_pa")
![[en-en] tesa Smart Mounting system, adhesive nail for wallpaper ,2 x 1kg](/en/files/images/202402/0/medium-11177551,11177551_padded1x1_18.webp "tesa_4042448416773_77773-00005_LI408_front_pa")